

Rasterize: How to create multiband raster from vector attributes using python
Raster and vector data are the two primary types of geospatial data. While rasters store data as gridded values that are rendered as pixels on a map, vector data stores assigned attributes of specific features represented as points, lines and polygons.
In geospatial data processing workflows, converting between these two data types is a common practice for several reasons. This can either be just for the purpose of visualizing the data or for incorporation into analysis schemes among others.
This blog post focuses on the conversion of vector to raster data (a.k.a rasterizing), particularly the challenge of creating a multiband raster from multiple vector attributes, and introduces a python-based approach for overcoming this bottleneck.
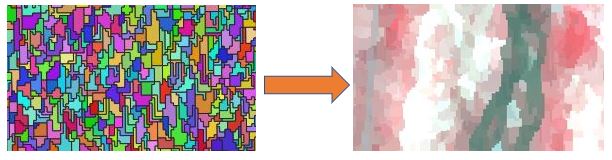
In simple terms, rasterizing vector data simply means burning the data stored in a given vector attribute into an empty raster layer of defined extent and pixel size. But what is the deal with creating multiband raster from multiple vector attributes?... Well, as at now, the implementation of the rasterize function in conventional GIS softwares (e.g. QGIS and ArcGIS) only outputs a single band raster at a time. This means that the process allows burning one vector attribute into a corresponding single band raster. At best, one can use batch processing or use model builder in case they are interested in burning multiple attributes into multiple single band rasters and then merging them into a multiband raster. But what if there are 100s or more attributes? That will be laborious and inefficient. This is where the power of python scripting comes in. In this example I draw from a case of converting the output from image segmentation (polygons with 92 feature attributes) into a multiband raster for further classification. Read on...
First, we need to import the required modules. Here, gdal and numpy are required for handling raster data in its original state (.tif) and when they are rendered as numpy arrays respectively, gdalnumeric is the interface between gdal and numpy, ogr is required for handling vector data and tempfile for temporary file management ( i.e. we will save some files initially as a temporary file).
											import gdal

											import gdalnumeric as gdn

											import ogr

											import numpy as np

											import tempfile
Next, we need to create some base fuctions on which the whole process will run. To summarize what we want to achieve: (i) Each vector attribute will be burned into a single band raster. The extent, resolution and projection of each raster will be sourced from a reference image. In this case, the original image used for segmentation; (ii) Each raster will then be converted into a 3-D numpy array (i.e. rows, colums, bands) and subsequently concatenated into a multiband image array; (iii) Lastly, the multiband image array will be converted into .tif raster and then written to file.
											def rasterize(ref_raster, shp, attrib_name):


											# open reference raster and fetch resolution, projection and extent

											raster_ds = gdal.Open(ref_raster)

											ncol = raster_ds.RasterXSize

											nrow = raster_ds.RasterYSize

											proj = raster_ds.GetProjectionRef()

											ext = raster_ds.GetGeoTransform()

											raster_ds = None


											# create empty raster (.tif) as temporary file and set its projection and extent to
 # that of the reference raster

											temp_out = tempfile.NamedTemporaryFile(suffix='.tif').name

											memory_driver = gdal.GetDriverByName('GTiff')

											out_raster_ds = memory_driver.Create(temp_out, ncol, nrow, 1, gdal.GDT_Byte)

											out_raster_ds.SetProjection(proj)

											out_raster_ds.SetGeoTransform(ext)


											# open shapefile vector layer to retrieve and burn attribute into the empty raster

											mb_v = ogr.Open(shp)

											mb_1 = mb_v.GetLayer()

											gdal.RasterizeLayer(out_raster_ds, [1], mb_1, options=["ATTRIBUTE="+attrib_name])

											return temp_out
The script above is the rasterize function, which takes three arguments. ref_raster is the reference image from which the resulting image extent and projection are extracted; shp is the vector layer (shapefile) to be rasterized and attrib_name is the vector attribute whose data will be burned into the resulting raster.
Next is the image to array function (img_to_array) which takes the resulting raster (input_file) from the rasterize function and converts it into an image array.
											def img_to_array(input_file, dim_ordering="channel_last", dtype="float32"):


											# open input raster, retrieve bands and convert to image array

											file = gdal.Open(input_file)

											bands = [file.GetRasterBand(i) for i in range(1, file.RasterCount +1)]

											arr = np.array([gdn.BandReadAsArray(band) for band in bands]).astype(dtype)


											# reoder dimensions so that channels/bands are last

											if dim_ordering=="channel_last":
											arr = np.transpose(arr, [1,2,0])

											return arr
The last supporting function is array_to_tif which takes three arguments: array is the image array from the img_to_array function; raster is a reference image used to determine the extent and projection of the output image (.tif); and dst_filename is the destination filename used to write the output image file to disk.
											def array_to_tif(array, raster, dst_filename):


											# set output image resolution, extent and projection

											src_raster = gdal.Open(raster)

											x_pixels = src_raster.RasterXSize

											y_pixels = src.raster.RasterYSize

											ext = src_raster.GetGeoTransform()

											proj = src_raster.GetProjection()


											# create empty raster (.tif) to which array will be written

											bands = array.shape[2]

											dtype = str(array.dtype)

											dtype_mapping = {'byte': gd.GDT_Byte, 'uint8': gd.GDT_Byte, 'uint16': gd.GDT_UInt16, 'int8': gd.GDT_Byte,  'int16': gd.GDT_Int16, 'int32': gd.GDT_Int32, 'uint32': gd.GDT_UInt32, 'float32': gd.GDT_Float32}

											driver = gdal.GetDriverByName('GTiff')

											output = driver.Create(dst_filename, x_pixels, y_pixels, bands, dtype_mapping[dtype])


											# set output image extent and projection

											output.SetGeoTransform(ext)

											output.SetProjection(proj)


											# write image array into empty raster

											for i in range(bands): output.GetRasterBand(i+1).WriteArray(array[:, :, i])

											output.FlushCache()
With all the supporting functions ready, the last steps involve importing the reference raster and the vector data to be rasterized, processing the vector data to get the desired attributes to use, running the rasterization process proper (i.e. creating multiband raster) and finally saving the multiband raster. The script below does exactly these.
											# import data

											inRaster = "path/to/reference/raster.tif"

											inVector = "path/to/vector/data.shp"


											# get vector layer attribute names

											lyr = ogr.Open(inVector)

											lyr = lyr.GetLayer()

											all_attribs = [attrib.name for attrib in lyr.schema]

											final_attribs = [attribs for attribs in all_attribs if attribs not in ['list of attributes to exclude']]


											# create multiband raster

											img_array_list = []

											for i in final_attribs:


												fx = rasterize(inRaster, inVector, i)

												fx_array = img_to_array(fx)

												img_array_list.append(fx_array)


											fx_multi = np.concatenate(img_array_list, axis=-1)


											# save raster

											array_to_tif(fx_multi.astype(np.float32), inRaster, "path/to/multiband/raster.tif")
Congratulations! This is all you need to do to create a multiband raster from multiple vector attributes. Thanks for stopping by.